Sunday, October 23, 2016

Redeux

I know... I know...I'm terrible at updating this Blogspot about my project (over a year!), but life sometimes gets in the way. I started a full-time job in January and my brother just got married last weekend to name a few things, so I've had quite a bit of change this year and still kind of readjusting. I was used to having a little money and lots of time, being in college and working part-time. Now, it seems like I have a little more money and a lot less time haha. Sorry for the lack of updates regardless, I want to try to update more often to keep the momentum/progress going.

The plan with the Datsun has changed in kind of big way. The Z, in reality, needed a lot of work (even though I said it was near "running/drive-able"). I was counting on everything working, although it hasn't ran in however many years (at least two in my possession) and was last registered in Nevada then went Non-Op? (surrendered license plates), making it a little complicated to get it registered here in California (not impossible, but probably more difficult). I ran into a few more issues and even though not many, it tends to add up both time and money-wise. At the two year mark of owning the Z (April 2016), I was sitting outside one night staring at the car, thinking of how much longer and how much more money it was going to take me to get it running at least (not to mention driving SAFELY). Looking back, I realized I was overoptimistic about buying that car as a project. Although, I did get it for a good price (for a rolling shell), what I needed was a Z that was running/driving (among other things) as a better starting point. So, I bought another 260z since it just made more sense money and time-wise.


I will keep the green Z (which will be referred to as "parts car") and will transfer all the new parts I bought to the new 260Z (side note: when I refer to my Z from now on, I mean the new one). Mechanically, the main issues it has was with the SU carbs and fuel lines, which I was going to swap out anyway. Also, I need to fix some wiring since one of the PO's thought twisting wires together and sometimes using electric tape to keep it together was a good enough fix rather than solder/crimp and heatshrink. The combination of these two things and a battery without a battery tie-down and a loose (-) terminal made it difficult/sketchy for my brother to drive back home and we had to stop every 20 mins (took streets from near Upland to W.L.A.) to recheck everything. But it made it back under it's own power, nonetheless. The car is registered in my name so I'm OFFICIALLY the owner of a 260z.

Also, I never updated when I purchased my triple Weber carburetors (see below), which I installed on my parts car and I've since transferred it, as well as my 6-1 headers, to my Z. I already installed braided fuel lines linking the Webers with AN fittings, but still need to finish lines to gas tank. Also, I need to change out the expansion plugs since one was leaking pretty badly due to it rusting out (might as well do them all). The leaking expansion plug kept getting punctured instead of getting knocked out so I might have to carefully dremel it partially and grab the rest out or may have to dremel the whole plug. This all means the car is not running atm (I know what you're thinking, lol), but I'm definitely thinking and planning this Z out more thoroughly.


I also previously bought Wilwood calipers with new pads/rotors, Techno Toy Tuning (T3) : GTX2 front LCA and TC rods, outer tie rod ends, front and rear coilovers (not pictured), and rear LCA (not pictured). I will be swapping/installing these parts later on in the future on a lift at the shop I currently work at (I'm spoiled now haha) instead of my driveway.

My main goal is to get it running with the Webers (and tuned), fix the wiring issues, and just enjoy it mostly stock for a while. One of the things I learned before with the other car is to not jump in too deep. It means less down time and more time enjoying the car, which also allows me to feel the before/after difference. That's the plan for now, I'll update again when I've made some progress!

Friday, June 19, 2015

It's been a long time

It's been a while since I've made a post on here. School was hectic as I just walked the stage at CSULB in May with my friends. I still have another semester left to finish up the last few classes but I didn't want to walk alone haha. Work has been crazy too and my schedule is inconsistent since people are going to vacations and I have to pick up random hours at times. But hey, more hours more car parts, right? Man, I seriously respect the hustle of people doing 35+ hours work weeks getting paid minimum wage. I'm working like 32 hours and I feel dead tired. Anyways, onto the car stuff.

A few things have happened since the last time I posted. The fuel hoses came in and I started working on replacing the wheel studs... however, for the front, the wheel assembly needs to be removed from the front rotors in order to replace them. They ended up being rusted together haha. WD-40 and hammering away didn't seem enough to separate the two so I threw in the towel. It was mostly the rear studs I wanted to replace anyway since a few were broken already and the fronts looked good so... yeah haha not going to bother with it so I'm putting everything back together today. Here's some pics of what I cleaned up in the process!


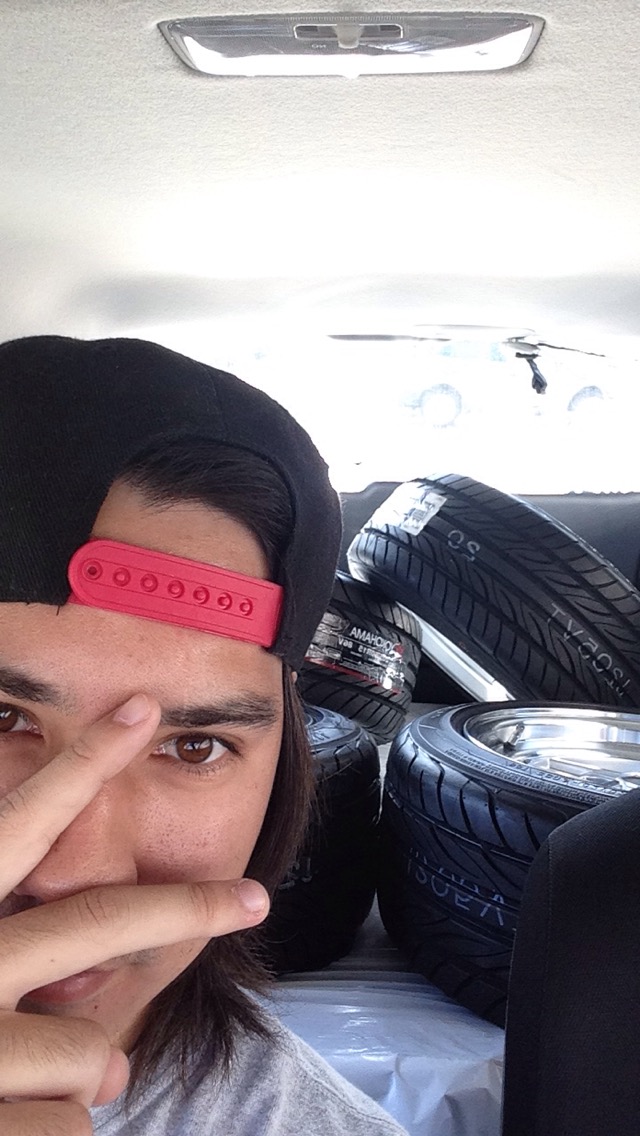
I also got some tires back in April! I ended up getting some Yokohama S-Drives in 205/50/15. Some stretch on the wheels I got but it's not too bad. Here's some pics!


Every time I saw my dirty, stiff, and crusty shiftboot, I wanted to do something about it. I knew I could buy a replacement, but where's the fun in that? I want the car to represent myself. As a person who loves the Star Wars movies, I figured why not buy some Star Wars fabric and make my own? I ended up taking out the stitching from the original to trace out for templates which I transferred to the fabric to cut out. The original boot had 4 sections so I tried it that way (shown in the following pics). Just need to stitch the seems together inside out so when you flip it the right way, it looks clean.


 Don't worry, I restitched the top since it was sloppy. But, this is what
it generally looks like. I made another one with two sections instead of
four and it looks better IMO since you can see of the comic book
covers more clearly but the other one stands up more easily so
I'm going to hang onto both and test fit when the time comes.


In addition, I wrapped my 6-1 exhaust headers with titanium header wrap which was a pain in itself. I ended up using 100ft. worth of wrap. Right now the headers are coated with a high temperature silicone coating to further keep the heat in the header and not so much in the engine bay which helps when your carburetors sit directly above the headers.


That's basically everything up until now! I just resprayed my center console which looks sooo much better now but I'm going to wait until it dries to take any pics so it'll be in the next update as well as putting up the pics with the wheel hub assembly/wheels actually on the car! Maybe more interior stuff and putting more parts back on the car also!

Sunday, March 29, 2015

Momo Steering Wheel x NRG Quick Release

Hey everyone!

The Boss steering wheel adapter (plus horn button) came like a week earlier than expected and I also received the NRG 2.0 quick release a few days before. So last Friday I decided to install the hub adapter, quick release, and steering wheel and to have everything hooked up. Had to make some adjustments on the horn button to make a better ground than having to solder onto it (which I could have done). It was pretty simple and I used the old ground setup on my brother's old Honda horn button. I tried just switching the emblems but it just didn't work out.


NRG 2.0 quick release.I don't have  a picture of the boss wheel adapter 
because I got too excited that it came early and ripped it up lol.


There's plenty of guides online on how to take off the Z steering wheel so I won't go into detail on the process. Make sure the steering wheel (and wheels!) is straight before you take it off (take off column cover, stock horn pad, take off nut/washer thing, remove wheel basically). Put the Boss adapter on (I put it so the arrow is pointing to the top) and tighten the removed washer and nut down (I marked it with a paint pen to the end of the steering column so I know how much it needed to be tightened). Make sure the horn shoe makes contact with the back of the adapter if you want your horn to work! Now for the quick release, just connect the male connection on the quick release to the female on the adapter and the female connection on the ground. After that tighten the back of the quick release to the adapter. Then front of the quick release, feed the wires through the steering wheel to the horn button (power and ground), pretty straight forward and tighten the steering wheel to the quick release. Should take about 20 minutes. Took me 40 minutes since I had to fiddle with the horn button. I was afraid that it would feel super close since it added ~4 in. compared to stock, but it actually feels comfortable to me!

Here's a very short video of it.


Well, that's all for now! I just order the hoses that I needed for the gas tank and I plan on buying new tires for the Z sometime this week to get them mounted on my wheels. Going to replace all the wheel studs before putting all of that on as well. Until next time!

Side note: Check out this cool Z I saw on the 405S last week, Pretty awesome 3 piece spoiler that I'm considering getting  as well. The huge overfenders are way too big for his current wheel/tire setup, but would be amazing once it comes together imo. The paint was perfect and my picture isn't doing it justice. It looked like a nice midnight purple or something. 

Tuesday, March 17, 2015

It's been a while.

Hey everyone!

I know it's been a while, school has been taking up a lot of my time and I've been strict with spending money on car parts since I'm only working one day a week. Even though I have money set aside specifically for the Z and I could buy more, I feel like spending it all at once seems like an irresponsible decision to make. This also gives me more time for research for different parts/brands and mods that I would like to do. I still feel like I will be able to achieve my goal of running and driving by 2016! It would be very cool if I could have it running by the 1 year mark in May, though!

Anyways, since the last update, nothing much has gone on. I've bought new wheel studs for the front and rears and will need to buy tires soon so I can finally put on my wheels! Also, I recently bought a bought an NRG  2.0 quick release and Boss steering wheel adapter! I bought those because my brother gave me his old Momo steering wheel that was from his Civic Si! Hopefully it won't be super close to me in the driving position since with the adapter and quick release both add onto the distance from the steering rack (one of the complaints I've heard). Even though I'm considered short, the way I drive is kinda laid back anyway so it probably won't be too bad I imagine especially with my short arms,

Thanks bro!

The only thing I've done to the car was put the dash back into the car which was challenging with this heat that we had this week. It's a two person job imo and luckily I had my brother available to help in the morning. Overall, it wasn't too bad if you disconnect the wiring harness and turn signal/ windshield wiper lever to help speed things up so you're not working in a cramped space/upside down to reconnect everything lol. Lots of angles and wiggling but slipped into place pretty easy. The screws/bolts near the windshield are kinda difficult to reach but weren't not too bad to put back.


Kinda looks battle-scarred with the cracks semi-exposed, but
that adds a little character to my car, which I like. Sure, a perfect
dash would be more aesthetically pleasing, but my dash is one of 
a kind and I can accept it for it's flaws. Scars are cool anyways ;-)


Well, that's all for now. More car parts to come and be installed!


Wednesday, January 14, 2015

New wheels

Since my old wheels had cracks which were poorly repaired and wouldn't hold air well (well mainly the rears), I decided that I would get both new wheels and new tires (definitely need new tires as the current ones are deteriorating). I could have gotten used wheels, but after looking at forums and craigslist, the sellers were either too far, asking too much, or selling really beat up wheels. When I was looking on Datsun forums to see what would look great and fit on my Z, I saw these Enkei Apache II on one Z and I knew that's what I wanted. Classic wheel design, yet brand new (and affordable compared to other wheels). They are the correct bolt pattern 4x114.3 meaning I didn't have to go through a 5 lug conversion to fit more modern wheels and came in a 0 offset at 15x8 which means I don't need spacers or that I didn't need to roll my fenders or cut them for fender flares (which I was on the fence about in the first place). All in all, it met every single one of my needs. AND I got free shipping on them which made me really happy that I saved some money!

Opened up the first box and I was extremely happy on how they looked
that I had to take a picture of them to upload onto Instagram/Tumblr.


Although it was short-lived. As I was opening each box inspecting each
wheel, the very last wheel I noticed a small nick on the lip. I was a little
disappointed that I paid to get new wheels and it was already damaged.
The damage isn't too bad (less than 5mm long) but the idea hurts more.
I contacted the retailer and they said they can't replace it as the wheels
are now out of stock and they are not sure when they'll be restocking, but they
can refund me 2-3 weeks after they receive the wheel back (meaning about 4 weeks).
I told them the shipping cost in relation to the wheel cost wouldn't make sense and
that I'll just deal with it. They ended up giving me a small refund for the inconvenience
(not as much as a new wheel, but hey I'll take it). Even if they covered the shipping, if I were
to order a new wheel elsewhere, with shipping and tax it would  still be more than the whole refund.
I rather keep the wheel and get that small refund. It makes the most sense to me.
One of my friends said she knows someone that can probably repair it and
I would just need to buy them a 6-pack or something haha. 


 Here's what they look on the like on the car! I can't wait to get
some new tires and see how well it sits. Plan is to get some 
Yokohama S-Drive 205/50R15. I'm hoping my friend can get
me a discount, but if not then it's okay because the tires aren't 
too expensive and it shouldn't be too bad, as I thought tires would
cost more initially. 


Wednesday, January 7, 2015

Some Assembly Required

I hope everyone enjoyed the holidays and happy new year! First, I would like to thank my Aunty Kay for the Autozone giftcard which definitely came in handy as Erik and I needed new gloves, throttle body cleaner, towels, etc.. and also to the rest of my family for money that I used toward getting a 1/2" breaker bar and 3/8" torque wrench (which I really needed for what I was planning to do next).

So the last week I've been preparing to drop the engine and transmission back into the car on Sunday. Although I didn't rebuild the engine as I planned before, it was good to take it out, replace the valve cover and oil pan gaskets, and clean it up (at least to my best ability). It was also good to take a look at the clutch so I didn't mind the whole process of taking everything out just to put back in. It wasn't a waste of time imo.  My brother was nice enough to volunteer his time before he went out for the day.

Rolled the engine on the stand out of the garage to the car.

We put the oil pan back on with new hardware then put the 
engine on a mover's dolly while we get it leveled with the 
transmission to put them together.

Torquing the flywheel bolts down to spec with locktite (blue bottle). 
Note: we used my deep 13mm socket to hold the flywheel in place. 

Clutch and pressure plate were then torqued down to spec as well.

Proper lubricating to make sure everything goes smoothly. 

Bolting the transmission to the engine

Probably would be lectured as to where we decided to
lift the engine and transmission from an expert but we didn't run into
any issues or did it feel sketchy at all although it may have been easier 
in another spot.


 Took a while to wiggle the engine in the proper spot for the 
bolts to slip into the engine mounts. Had to look for the bolts in a 
little bin as the previous owner didn't have installed when I received my car...
Towed all the way from Nevada without the engine OR transmission bolted
in place. I'm glad everything worked out in the end.

And everything is secured in place! I need to buy 
two bolts to secure the transmission crossmember
in place as they were not provided with the car... 

I also decided to clean up a few things I 
had laying around covered in oil/grease/dirt haha.


That's all that basically happened recently. I also bought some other parts but you will have to wait until they come in next week to find out what it is! Stay tuned!

Tuesday, December 23, 2014

Coming together

As this year comes to a close, I can slowly see my car coming together. Although it's most likely will not be running by the start of the new year, I'm okay with that. There's no need to rush through these things and I'd much rather have everything reliable and done correctly. It was a good goal to have, however I was not expecting schoolwork to take up that much of my time along with working as well, so plans have changed. New goal is to have the car not only running, but roadworthy and registered by 2016 which I believe is plenty of time to  to give attention to detail.

Anyways, since the last update, a few things have came in.

Firstly, I would like to thank my grandma and grandpa Sorensen for the Dremel Tool Kit as an early Christmas gift which will allow me to make small precision cuts and grind/polish things as well. A very useful and versatile tool. You can never have too many tools haha.

Next, we have my MSA Sway bar kit (which had been out of stock since early November)  which include new sway bars, endlinks, and brackets and should help with handling. I also got two new fan belts since the old ones looked worn out.


I've also spent some time today working on the interior of the car. As you can see from this picture below that I took in May, there's an orange interior that I wasn't fond of. Mainly because it was super dirty and no matter how much I cleaned, it wouldn't come out. Also, the padding underneath would hold moisture well which isn't good and I wanted to inspect under it.

After I took out the orange trim, it left the padding exposed as seen below 
(top view driver's side)


The padding came off with ease.


Then there's the sound deadening which I wanted to take off as well.
Originally, I wanted to wait until I got dry ice so I could just hammer
it all off in chunks but since I had time, I just used a flat head and rubber
hammer as it was coming off relatively easy (floor on the other hand isn't).


Started at the rear of the tunnel. You can see the pile of sound deadening
near the passenger seat belt and that was only from the passenger side and top.


After an hour of removal, I decided that my back had enough and that I will finish
the driver's side later in the week and will have dry ice to do the rest of the car at the same time.


I've also have been working on my oil pan and it was covered with dirt, oil, and rust. After soaking it in apple cider vinegar (mostly for the rust) and cleaning it with a wire brush the majority of it was clean. I also used some throttle body cleaner (my brother had left over and didn't need it) which cleaned up the rest really well. Unfortunately, I didn't take any pictures of this process. We had some left over spray paint from another project (metallic silver or black) and my oil pan had bare metal exposed and some previous paint spots so my brother semi-jokingly suggested to paint it and I was thinking why not haha. I was going to do black but my brother said to try the silver.

I think it looks way better than before and the thing shines soooo bright in the sun. It'll be funny to see it on the engine since the rest is so dull and dirty. I think silver was the best choice haha.

Well, that's all for now. Happy holidays and stay safe!